
Shooting in a flat log profile is standard practice for professional aerial filmmakers. However, when you first import D-Log footage from the DJI Mavic 3 Cine into DaVinci Resolve, the desaturated, low-contrast image can be intimidating. Transforming this flat file into a rich cinematic sequence requires a disciplined color-grading pipeline.
For editors and directors, mastering a structured node tree is the key to preserving dynamic range and matching drone footage with high-end ground cameras.
The Physics of Log Compression
D-Log is a logarithmic exposure curve designed by DJI to capture up to 12.8 stops of dynamic range. By compressing the highlight and shadow details into a flat, middle-gray profile, D-Log prevents bright skies from blowing out and keeps shadow details from clipping into complete blackness. If you record in a standard profile (like Rec.709), this extreme contrast range is discarded in-camera, leaving you with unrecoverable details.
However, because D-Log compresses this data mathematically, you must unpack it using a Color Space Transform (CST) in post-production. Many beginner editors make the mistake of dropping a creative Look-Up Table (LUT) directly onto their first node. This clips the highlights, crushes the shadows, and introduces significant digital noise into the image.
The Standard 4-Node Grading Tree
To grade D-Log footage cleanly, build a serial node tree in DaVinci Resolve. We recommend a four-node structure to keep your exposure adjustments separate from your color transforms:
- Node 1: Exposure & Contrast — Adjust the lift, gamma, and gain wheels to expand the image contrast back to a natural range. Keep your waveform monitor open to ensure shadows do not cross 0 and highlights do not exceed 1023.
- Node 2: White Balance & Saturation — Correct any color casts introduced by atmospheric haze. Use the vectorscope to align your whites and skin tones along the correct axes.
- Node 3: Color Space Transform — Apply DaVinci Resolve's native CST effect. Set the input color space to DJI D-Gamut and the input gamma to DJI D-Log. Set the output color space to Rec.709 and the output gamma to Gamma 2.4. This performs a mathematically perfect color conversion.
- Node 4: Creative Grade — Apply your custom stylistic choices, secondary color selections, or film emulation looks on this final node, after the image has been normalized.
Flight-Ready Breakdown
Creative GuideWhat Changed
Flat logarithmic profiles compress sensor exposure data, requiring node-based transforms in post-production to reconstruct natural contrast.
Why It Matters
Applying creative LUTs directly to raw log nodes limits color latitude and introduces sensor noise. Separation of exposure and transform is mandatory.
Before Your Next Mission
Expose your D-Log footage slightly to the right (ETTR) using zebra stripes to keep shadow detail above the sensor's noise floor, and grade using a structured 4-node tree.
Matching Aerial and Ground Footage
In high-end film production, consistency is everything. If your ground camera is an ARRI Alexa and your drone is a Mavic 3 Cine shooting in ProRes 422 HQ, you can use Resolve's CST nodes to map both sources to a common workspace (such as ACES or DaVinci Wide Gamut). By standardizing your color workspace, you ensure that your cuts between the aerial sweeps and close-up character shots are visually seamless, keeping the viewer immersed in the story.

Related Briefs
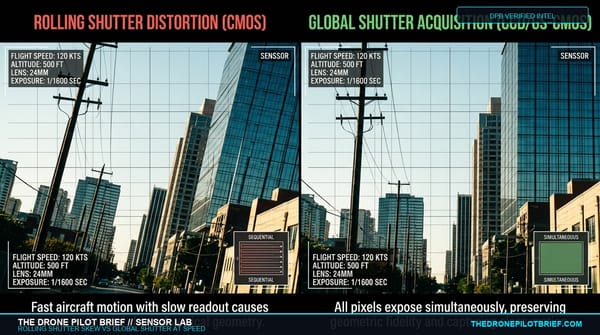
Rolling Shutter vs. Global Shutter at Speed: The Geometric & Cinematic Sensor Benchmark
Why do vertical telephone poles lean at 15 m/s and why does 4K cinema footage develop 'jello'? We bench-tested CMOS sensor readout speeds across aerial photogrammetry reconstructions and high-speed cinema passes....
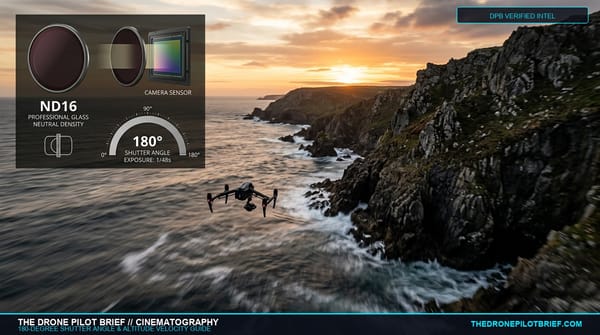
The 180-Degree Shutter Rule at 400 Feet: Why Ground Speed Dictates ND Filters More Than Sunlight
Slapping an ND16 on your drone because it is sunny outside is a recipe for stuttery footage. Here is the operational physics behind angular motion blur at altitude and how to calculate your true shutter angle....

Understanding ND Filters for Smooth Cinematic Motion
Learn how to calculate filter density and maintain the 180-degree shutter rule during bright daylight flights....
Get The Preflight
The weekly operational-intelligence briefing for drone pilots. Filtered down to what actually matters before your next mission.